One of the most rewarding parts of hunting is knowing you can provide clean, organic protein for yourself, your family, and your friends. But that journey doesn’t end at the shot—it truly begins once you’ve harvested your game animal. Proper field processing ensures your meat stays fresh, flavorful, and safe. Whether you’re new to hunting or just looking to improve your techniques, here are some tried-and-true tips for processing your game animal after the hunt.
Start with the Right Tools
Having the right gear in your pack makes a big difference in how efficiently and cleanly you can break down an animal. A few essentials include:
• Sharp knives: A quality field dressing kit ensures you can make precise cuts and reduce waste. We recommend the Outdoor Edge WildPak 8-Piece Field Dressing Kit for a lightweight, all-in-one solution.
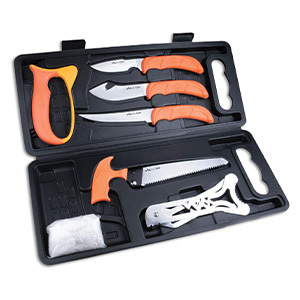
• Bone saw: When you need to split a pelvis or rib cage, a compact saw like the Gerber Vital Pack Saw comes in handy. We just used one of these on an elk last week, and it saved the day.

• Gloves: Disposable nitrile gloves protect both you and the meat. Try Ammex Nitrile Exam Gloves.

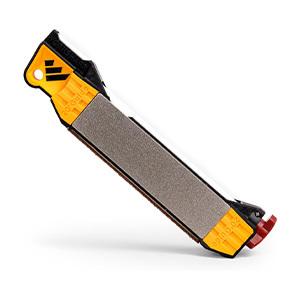
Pro tip: Always pack an extra knife or sharpener. A dull blade slows you down and increases the chance of accidents.
Field Dressing Basics
The first step after recovery is removing the internal organs to cool the meat as quickly as possible. Here’s the simple process:
1. Lay the animal on its back and make a shallow incision from sternum to pelvis, being careful not to puncture organs.
2. Gently roll out the entrails, cutting connective tissue as needed. If possible, prop the body cavity open with a stick to promote airflow and cooling.
3. If you’re in warmer climates, time is critical—getting the body cavity cooled quickly prevents spoilage.
A lightweight game bag set is also key for keeping dirt, bugs, and debris off the meat.

Skinning and Quartering in the Field
If you’re packing an animal out, skinning and quartering in the field can save time and weight. Hang the animal if possible, or lay it on a clean tarp to keep meat off the ground.
• Start skinning at the legs and work your way up, pulling the hide as you go rather than cutting too deeply.
• Remove quarters one at a time—hindquarters, front shoulders, backstraps, and tenderloins.
• Place meat directly into breathable cotton game bags to cool while you pack out.
At-Home Processing
Once your meat is home and cooled, you can trim, grind, and package it for the freezer. A few tools can make this process much smoother:
• Meat Grinder: If you love burgers and sausages, the LEM Products #8 Big Bite Grinder is a workhorse.

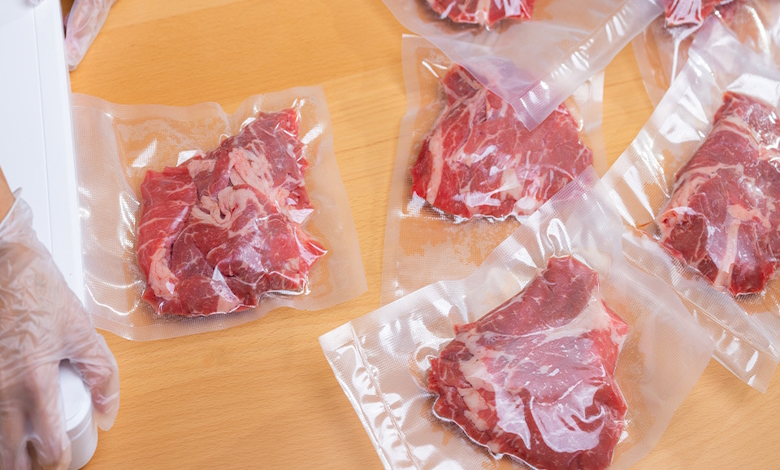
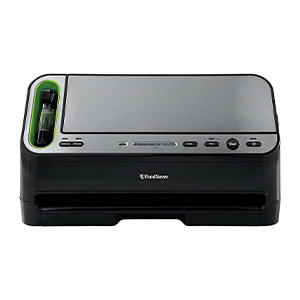
• Vacuum Sealer: Prevent freezer burn and extend shelf life with the FoodSaver V4400 Vacuum Sealer.
• Butcher Paper: For those who prefer traditional wrapping, Brown Kraft Butcher Paper is a reliable choice. Label everything with the cut type and date, so you know exactly what’s in your freezer six months later.

Bonus Tips from the Field
• Keep it clean: Bring a pack of unscented wet wipes to clean hands and knives mid-process.
• Save the scraps: Neck meat, shanks, and trim are perfect for stews, chili, and grind. Don’t waste those flavorful cuts!
• Cool quickly: In hot weather, a cooler filled with frozen water jugs can buy you precious time until you get back to camp or home.
Final Thoughts
Processing your own game is part of the full hunting experience. It connects you to your food in a way that few people ever get to experience. With the right tools and a little practice, you’ll turn every successful hunt into delicious meals and a freezer full of memories. Whether you’re new to hunting or a seasoned veteran, investing in the right gear will make your field-to-freezer journey smoother, safer, and more rewarding.